Hey Guys,
In My Last Article, we learned how to Fetch Data from the internet using the http package.
Now what about Sending Data to the Internet 🤔, yeah it so easy also...
Sending data to the Internet is necessary for most apps. The http package has got that covered, too.
These few steps below show us how we can achieve this.
Add the http package.
Send data to a server using the http package.
Convert the response into a custom Dart object.
Get a title from user input.
Display the response on the Screen.
So we will go through these steps together,
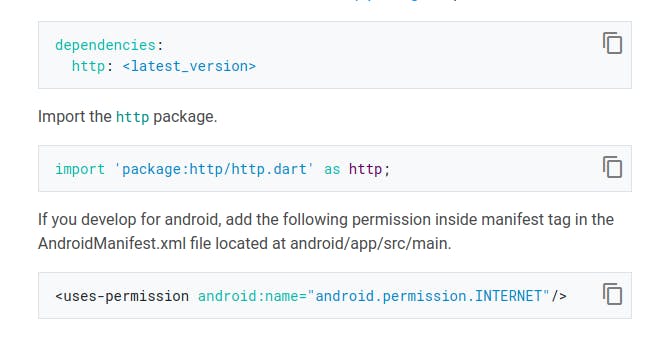
- Add the http package
To install the http package, add it to the dependencies section of the popular pubspec.yaml file (pronounced pubspec dot yamul or yaamu file 😂). You can find the latest version of the http package on pub.dev.

-Sending data to Server
We will be using the instance of sending an Album to the Server and we can do that by sending an Album title to JSONplaceholder using the http.post() method.
 Future<http.Response> createAlbum(String title) {
    return http.post( Uri.parse(
    'https://jsonplaceholder.typicode.com/albums'
      ),
    headers: <String, String>{
     'Content-Type': 'application/json; charset=UTF-8',
     },
  body: jsonEncode(<String, String>{
   'title': title,
    }),
   );
 }
The http.post() method returns a Future that contains a Response. Just like we have learned previously:
Future is a core Dart class for working with asynchronous operations. A Future object represents a potential value or error that will be available at some time in the future.
The http.Response class contains the data received from a successful http call. The createAlbum() method takes an argument title that is sent to the server to create an Album.
Convert the http.Response to a custom Dart object
To make your life easier, it is better to convert raw data into Dart objects. How do we convert our Data into Dart object?
Create an Album Class
Convert the http.Response to an Album
But I don't know how to create an album class, and I can't even converts http.Response to an Album!!! Dont worry mate. I gat you covered! 🤝 Just follow this instance of a class.
class Album {
  final int id;
  final String title;
 Album({required this.id, required this.title});
   factory Album.fromJson(Map<String, dynamic> json) {
  return Album(
      id: json['id'], title: json['title'],
       );
   }
  }
Converting http.Response to an album, very easy: Use the following steps to update the createAlbum() function to return a Future:
Convert the response body into a JSON Map with the dart:convert package.
If the server returns a CREATED response with a status code of 201, then convert the JSON Map into an Album using the fromJson() factory method.
If the server doesn’t return a CREATED response with a status code of 201, then throw an exception. (Even in the case of a “404 Not Found” server response, throw an exception. Do not return null. This is important when examining the data in snapshot, as shown below.)
I hope this is not too difficult to do, check this code snippet below to have a better understanding...
Future<Album> createAlbum(String title) async {
   final response = await http.post(
   Uri.parse(
    'https://jsonplaceholder.typicode.com/albums'), headers: <String, String>{
     'Content-Type': 'application/json; charset=UTF-8',
       },
  body: jsonEncode(<String, String>{
   'title': title,
    }),
    );
  if (response.statusCode == 201) {
      // If the server did return a 201 CREATED response,\
     // then parse the JSON.
   return Album.fromJson(jsonDecode(response.body));
 } else {
  // If the server did not return a 201 CREATED response,
 // then throw an exception.
 throw Exception('Failed to create album.');
   }
 }
YES!!! Now you’ve got a function that sends the title to a server to create an album.
- Get a title from user input
Next, create a TextField to enter a title and an ElevatedButton to send data to the Server. Also, define a TextEditingController to read the user input from a TextField.
When the ElevatedButton is pressed, the _futureAlbum is set to the value returned by createAlbum() method. Something Like this: 👇👇👇👇👇👇👇👇👇👇👇👇👇
Column(
   mainAxisAlignment: MainAxisAlignment.center,
   children: <Widget>[
     TextField( controller: _controller, decoration: const InputDecoration(
        hintText:  'Enter Title'
      ), ),
     ElevatedButton( onPressed: () {
      setState(() {
          _futureAlbum =
         createAlbum(_controller.text);
     });
    },
  child: const Text('Create Data'),
   ),
   ],
  )
On pressing the Create Data button, make the network request, which sends the data in the TextField to the server as a POST request. The Future, _futureAlbum, is used in the next step.
From Here its as simple as saying ABC ✌️
- Display the Response on the Screen
To display the data on the screen, use the FutureBuilder widget. The FutureBuilder widget comes with Flutter and makes it easy to work with asynchronous data sources. You must provide two parameters:
The Future you want to work with. In this case, the future returned from the createAlbum() function.
A builder function that tells Flutter what to render, depending on the state of the Future: loading, success, or error.
Note: The snapshot.hasData only returns true when the snapshot contains a non-null data value. This is why the createAlbum() function should throw an exception even in the case of a “404 Not Found” server response. If createAlbum() returns null, then CircularProgressIndicator displays indefinitely.
FutureBuilder<Album>(
     future: _futureAlbum, builder: (context, snapshot) {
      if (snapshot.hasData) {
          return Text(snapshot.data!.title);
       } else if (snapshot.hasError) {
         return Text('${snapshot.error}');
         }
      return const CircularProgressIndicator();
     },)
Done! You have successfully, sent Data to a server on the Internet!!! what you can't do doesn't exist 😉. congratulations
if you would like to discuss this or any related issue Chat Me. Follow me on Twitter for More...
